Timing is everything when it comes to wedding invitations. Send them too early and guests may forget the details. Send them too late and you risk conflicting schedules, missed RSVPs, and last-minute catering headaches. The stationery process itself, from design to printing to assembly, takes longer than most couples expect, especially during peak wedding season.
This month-by-month timeline walks you through every milestone, from the moment you start thinking about save-the-dates all the way to the final RSVP follow-up one week before your celebration. Whether you are planning an intimate garden ceremony or a grand ballroom affair, this guide ensures your stationery lands in the right hands at exactly the right time.
12 Months Before: Lay the Groundwork
A full year out may seem premature, but this is the ideal moment to begin thinking about your invitation style, not designing it, but gathering inspiration. Start a folder on your phone or create a board on Pinterest dedicated to stationery you love. Pay attention to color palettes, typography styles, paper textures, and envelope treatments.
At this stage, you should also draft a preliminary guest list. You do not need exact addresses yet, but knowing whether you are inviting 60 or 200 people will influence your budget, your printing method, and even the size of your envelopes. Discuss the guest list with both families early to avoid surprises later.
Begin researching stationers and printing methods. Read reviews, request samples, and schedule introductory calls. If you are considering letterpress printing, know that popular studios book up months in advance, especially for spring and fall weddings. Getting on a printer's calendar now gives you breathing room later.
Finally, set your stationery budget. Industry guidelines from The Knot suggest allocating roughly two to three percent of your total wedding budget to paper goods, including invitations, programs, menus, and signage. For a $30,000 wedding, that translates to $600 to $900 for the full stationery suite.
10 to 11 Months Before: Design and Order Save-the-Dates
Save-the-dates are your first formal communication with guests, and they serve a vital logistical purpose. They give people enough lead time to request vacation days, book travel, and arrange childcare. This is especially important for destination weddings or celebrations over holiday weekends.
Work with your stationer to design a save-the-date that hints at the aesthetic of your wedding without giving everything away. Think of it as a movie trailer: it should generate excitement and convey the tone, whether that is rustic, modern, whimsical, or black-tie, without replicating the full invitation design.
Common formats include flat cards, postcards, magnets, and digital versions. Magnets are particularly popular because guests stick them on the refrigerator, keeping your date visible for months. Digital save-the-dates sent via email or a wedding website work well as a supplement, though etiquette experts at Brides recommend sending a physical piece for formal weddings.
Order your save-the-dates now so they are printed, addressed, and ready to mail by the eight-month mark.
8 Months Before: Mail Save-the-Dates
Eight months before the wedding is the sweet spot for sending save-the-dates. For destination weddings or events requiring significant travel, push this to ten or even twelve months. Guests who need to book flights and hotels will thank you for the extra notice.
Before mailing, double-check every address. Use the USPS address verification tool to confirm formatting and ZIP codes. Hand-address envelopes for a personal touch, or use a professional calligrapher if budget allows. At minimum, choose a script font for printed addresses that feels warm rather than corporate.
Include your wedding website URL on the save-the-date. This gives guests a central hub for travel information, hotel blocks, registry details, and eventually RSVP functionality. Keep the website live and updated from this point forward.
6 to 7 Months Before: Finalize Your Invitation Design
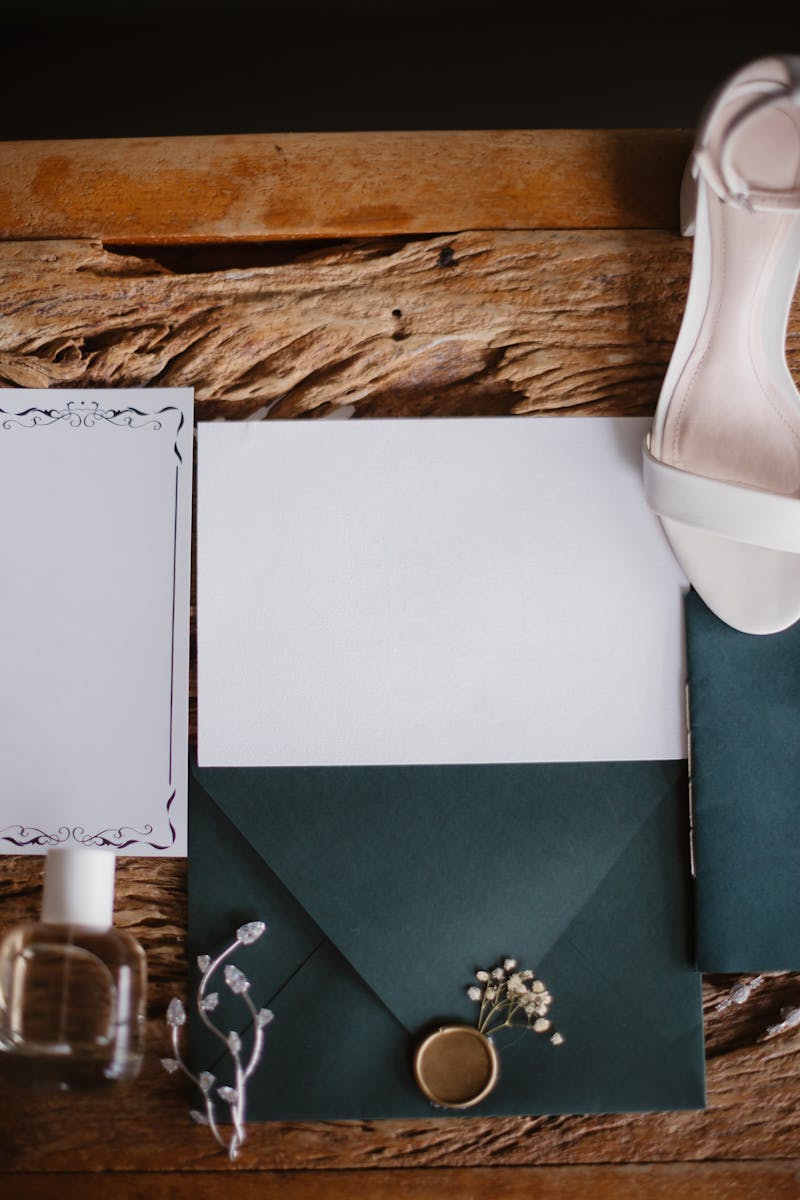
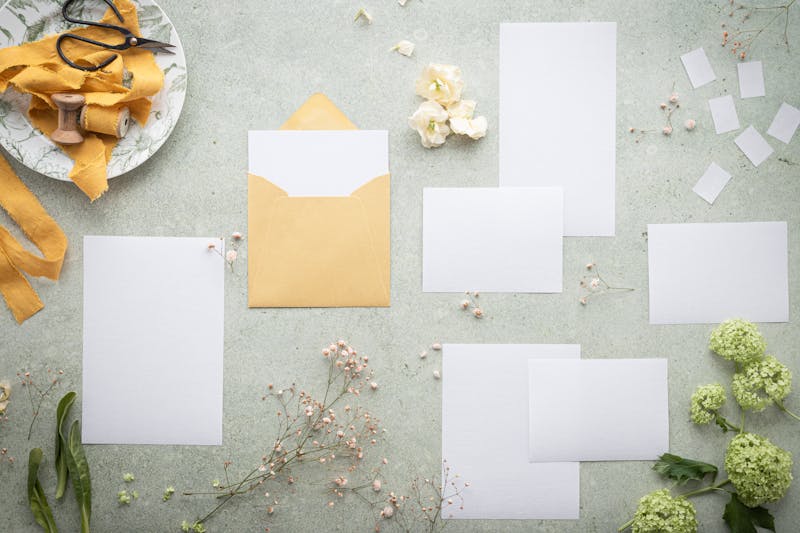
Now is the time to get serious about your invitation suite. Meet with your stationer to finalize the design, select paper stock, choose ink colors, and decide on any special finishes such as foil stamping, edge painting, or wax seals. Bring swatches of your bridesmaid dresses, linens, or flowers so the stationer can match the palette precisely.
Your suite will likely include several pieces: the main invitation card, an RSVP card with a pre-addressed return envelope, a details or enclosure card covering logistics like accommodations and transportation, and possibly a reception card if the ceremony and reception are at different venues. Discuss whether you want a belly band, envelope liner, or vellum overlay.
Proofread everything meticulously. Check the spelling of every name, every date, every address. Read the text aloud to catch awkward phrasing. Have at least two other people review the proof before you approve it. A typo on your wedding invitation is the kind of mistake that lives forever in family lore.
Place your print order by the end of month seven at the latest. Letterpress and engraved orders need six to eight weeks of production time, while digital orders require two to three weeks. Build in a buffer for shipping and assembly.
4 to 5 Months Before: Collect Addresses and Assemble
While your invitations are being printed, focus on finalizing your guest list and gathering mailing addresses. Send a group message or use a digital tool to request current addresses from guests. Many couples use their wedding website's built-in address collection feature.
Create a master spreadsheet that includes each guest's name, mailing address, number of seats allocated, meal preference column, and RSVP status column. This spreadsheet will become your command center for the next several months, so invest time in setting it up cleanly now.
When the printed pieces arrive, inspect every sheet. Check for color consistency, alignment, and print quality. Report any issues to your stationer immediately, as most offer a reprint window of seven to fourteen days.
Then begins the assembly process. Lay out all the components in order: invitation on the bottom, detail card next, RSVP card tucked into the RSVP envelope, and any additional inserts on top. If you are using a belly band or ribbon, wrap each suite consistently. Assembly is meditative and satisfying but takes longer than you think. Budget an entire afternoon, recruit a friend, pour some wine, and enjoy the process.
3 Months Before: Address and Stamp Envelopes
Three months out is when you should be addressing envelopes. Whether you hand-write them, hire a calligrapher, or print addresses directly, start early enough to allow for mistakes. Order ten to fifteen percent more envelopes than you think you need, because addressing errors happen.
Purchase postage before addressing. Take a fully assembled invitation suite to the post office and have it weighed. Square envelopes, oversized envelopes, and heavy suites often require additional postage. There is nothing worse than having your invitations returned for insufficient postage, a problem that is both embarrassing and costly. Ask for hand-cancellation rather than machine processing if your envelopes are delicate or embellished.
Consider using vintage or commemorative stamps for a touch of personality. The USPS offers floral, love-themed, and artistic stamp designs that complement wedding stationery beautifully. Order them online in advance, as specific designs can sell out.
6 to 8 Weeks Before: Mail Your Invitations
The standard rule is to mail invitations six to eight weeks before the wedding date. For destination weddings or events during busy travel periods like summer holidays or New Year's Eve, extend this window to ten or even twelve weeks.
Drop all invitations at the post office on the same day rather than mailing them in batches. This ensures guests receive them within a similar window, which prevents awkward situations where one friend knows about the wedding while another is still waiting for their envelope.
Set your RSVP deadline for three to four weeks before the wedding. This gives you enough time to follow up with non-respondents, finalize your headcount, and submit final numbers to your caterer, whose own deadline is usually ten to fourteen days before the event.
On the day you mail, update your spreadsheet to mark every invitation as sent. If you opted for RSVP tracking through your wedding website, verify that the system is working by submitting a test RSVP yourself.
4 to 5 Weeks Before: Monitor RSVPs
As RSVPs begin arriving, log each response immediately in your spreadsheet. Note the guest's name, number attending, meal preferences, and any dietary restrictions. If you are using online RSVPs in parallel with paper cards, consolidate both sets of data into a single document daily.
By now, you should start seeing a pattern. Roughly sixty to seventy percent of guests will respond within the first two weeks of receiving the invitation. The remaining thirty to forty percent will need a nudge, and some will not respond at all without direct outreach.
Do not panic yet. People get busy, they set the card aside intending to respond later, or they assume their attendance is obvious. The follow-up phase is completely normal and expected.
2 to 3 Weeks Before: Follow Up on Missing RSVPs
Once your RSVP deadline passes, identify every guest who has not responded and reach out personally. A brief, friendly phone call or text message works best. Something like: "Hi Sarah, just putting together our final headcount and wanted to check in. Are you and David able to join us on the 15th? We would love to have you there."
Keep the tone warm, not accusatory. Most people feel genuinely apologetic about forgetting. A phone call is more effective than a follow-up email because it is harder to ignore and conveys warmth that written messages sometimes lack.
For guests you cannot reach, enlist a mutual friend or family member to pass along the message. As a last resort, assume they are not attending when you submit your final count to vendors. You can always add a seat at the last minute more easily than you can remove one.
This is also the time to handle any last-minute additions. If space and budget allow, you may choose to extend invitations to B-list guests. While the concept of a B-list can feel uncomfortable, it is a practical reality for many couples. Send these invitations by overnight mail or hand-deliver them if the guests are local.
1 Week Before: Finalize and Breathe
One week before the wedding, your stationery responsibilities are nearly complete. Submit your final guest count and seating chart to the caterer and venue coordinator. Print any day-of paper goods you still need: programs, menus, place cards, table numbers, and signage.
Prepare a small basket of extra programs and a few blank place cards for the unexpected plus-one or the cousin who never RSVP'd but shows up anyway. Having a buffer prevents stress on the day itself.
Organize your remaining stationery supplies. Set aside a few extra invitations as keepsakes, one for your memory box, one for the photographer to include in detail shots, and one or two to give to parents. If you ordered calligraphy envelopes, keep a blank one for the same purpose.

Quick Reference Timeline
For easy reference, here is the entire timeline condensed:
12 months before: Gather inspiration, draft guest list, research stationers, set budget.
10 to 11 months before: Design and order save-the-dates.
8 months before: Mail save-the-dates, launch wedding website.
6 to 7 months before: Finalize invitation design, select paper and printing method, place print order.
4 to 5 months before: Collect addresses, prepare master spreadsheet, receive and inspect printed invitations, begin assembly.
3 months before: Address envelopes, purchase and apply postage.
6 to 8 weeks before: Mail invitations.
4 to 5 weeks before: Monitor incoming RSVPs.
2 to 3 weeks before: Follow up on missing RSVPs, send B-list invitations if applicable.
1 week before: Submit final headcount, print day-of stationery, set aside keepsakes.
Adjusting the Timeline for Special Circumstances
Not every wedding follows a twelve-month planning arc. Here are adjustments for common scenarios.
Short engagement (under six months): Combine save-the-dates with invitations or skip save-the-dates entirely in favor of a phone call or digital announcement. Order invitations immediately after securing your venue and date. Choose digital printing for the fastest turnaround and mail invitations eight weeks before the wedding at minimum.
Destination wedding: Push every milestone two months earlier. Save-the-dates should go out ten to twelve months before, and invitations should mail ten weeks before the event. Include detailed travel information and booking deadlines with the invitation suite.
Holiday weekend wedding: Guests need extra notice to plan around holiday travel. Mail invitations ten weeks out and set the RSVP deadline five weeks before the wedding to account for slower response times during holiday periods.
Intimate elopement or micro wedding: With fewer than thirty guests, you may skip save-the-dates entirely and send invitations three to four months in advance via personal delivery or overnight mail. The intimate scale allows for more flexibility and less formality in timing.
Common Mistakes to Avoid
Even the most organized couples stumble on a few predictable pitfalls. Here are the ones we see most often.
Underestimating assembly time. A suite with five components, a belly band, and a wax seal takes three to five minutes per invitation. For 150 invitations, that is seven to twelve hours of work. Plan accordingly and recruit help.
Forgetting to weigh the suite. Postage surprises are common. Always weigh and measure the fully assembled suite before buying stamps. An invitation that is a single gram over the one-ounce threshold requires an additional stamp on every envelope.
Setting the RSVP deadline too close to the wedding. Caterers and venues need final numbers at least ten days before the event. Your RSVP deadline should land three to four weeks before the wedding to give you time to chase missing responses and update counts.
Not ordering extras. Order ten to fifteen percent more invitations than you have guests. You will need extras for keepsakes, addressing mistakes, and last-minute additions. Reordering a small batch later is disproportionately expensive.
Skipping the proof review. Always request a physical proof, not just a digital PDF. Colors look different on screen than on paper, and only a physical sample reveals how the design interacts with the chosen stock.
Final Thoughts
Your wedding invitations are more than logistics. They are the opening line of your love story as told to the people who matter most. Giving yourself enough time at each stage, from early inspiration to final RSVP follow-up, transforms the process from stressful to genuinely enjoyable.
Print this timeline, pin it to your planning board, and check off each milestone as you go. When your guests open that beautiful envelope and smile, you will know that every carefully planned week was worth it.